
From a security perspective, generally, it would be better to allow communication from user segments to outside rather than from outside to user segments. Hence, we will be discussing Source Initiated Windows Event Forwarding in this article.
How to set up Windows Event Forwarding
Windows event forwarding can be configured in two ways.
- Collector Initiated: Here, the Windows Event Collector pulls the event logs from the endpoints.
- Source Initiated: Here, the endpoints push event logs to the Windows Event Collector.
What makes WEF convenient is that there is no additional software installation required. WEF uses WinRM (Windows Remote Management). WinRM is built into Windows versions starting with Windows Vista and Windows Server 2008.
Below are the steps involved in setting up Windows Event Forwarding.
Configuring the user account for Event Forwarding
By default, Windows Event Forwarding uses the Network Service account to read and send event logs from Forwarder to Collector.
The account does not by default have the permissions for this. The account needs to be added to the group Event Log Readers group. Below are the steps the add the account to the Event Log Readers group.
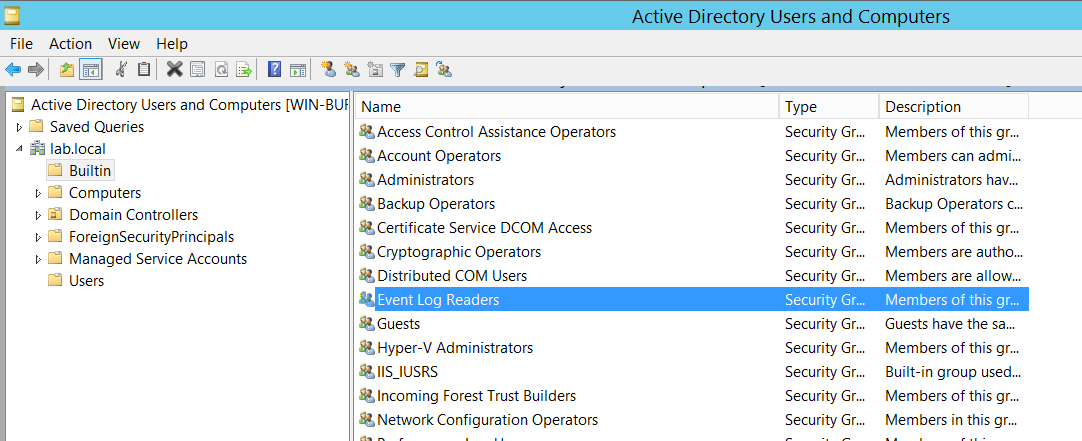
- Open Active Directory Users and Computers
- Navigate to Built-in and double click Event Log Readers
- Open the Members Tab
- In the Enter the object names to select text box, enter Network Service and click Check Names
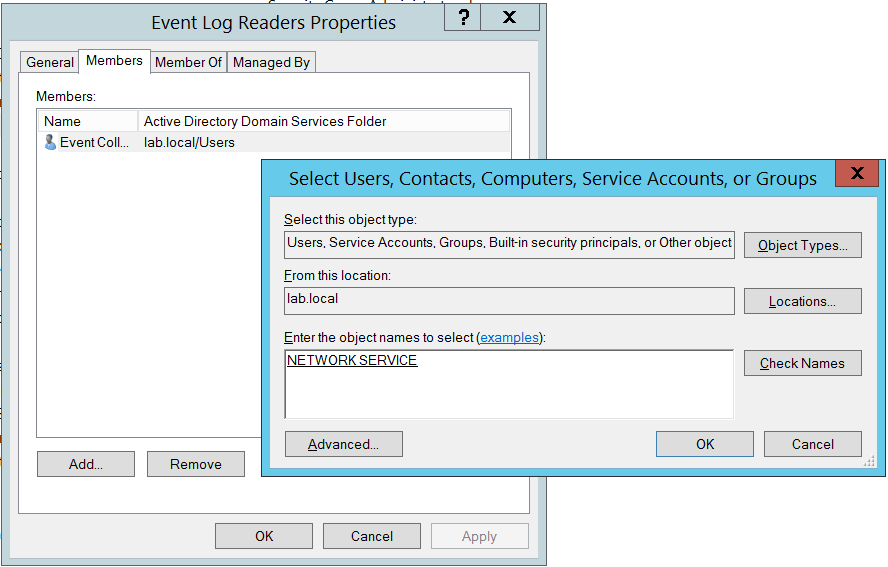
- Once the name is populated, click OK on both dialog boxes.
Enabling WinRM on Endpoints
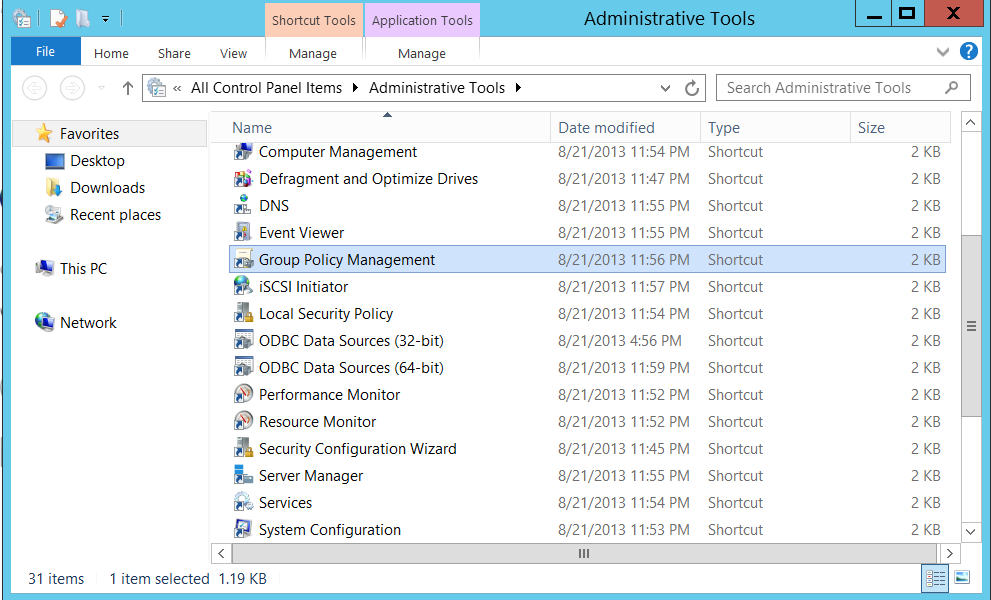
- Navigate to Control Panel > Administrative Tools > Group Policy management
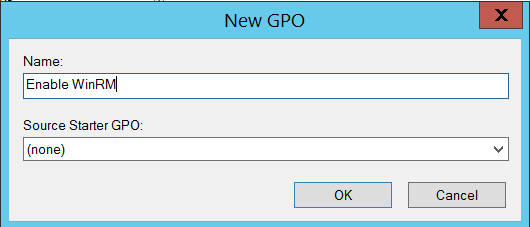
- On the left side navigation bar in Group Policy Management, navigate to Domains > , right click and select ‘Create a GPO in this domain, and link it here’.
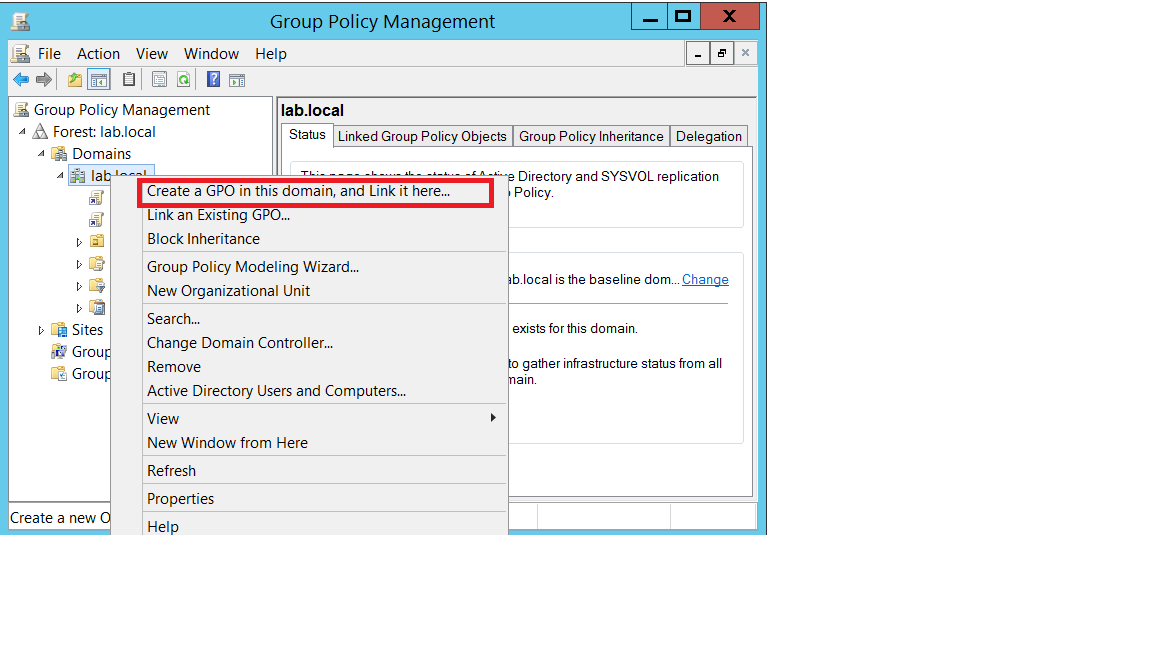
- Input a name such as ‘Enable WinRM’ and click ok.
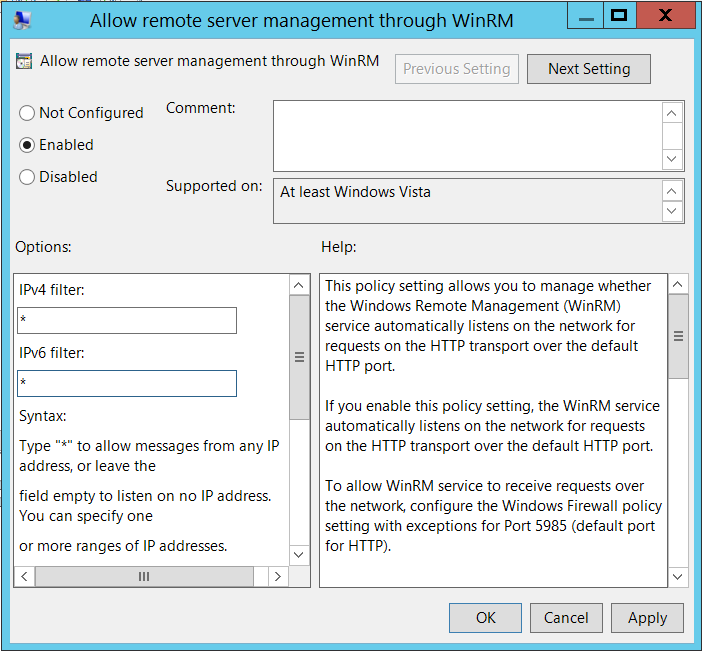
- On the left side navigation bar, navigate to Computer Configuration > Policies > Administrative Templates: Policy definitions > Windows Components > Windows Remote Management (WinRM) > WinRM Service.
- Right-click on Allow remote server management through WinRM and click ‘Edit’.
- Select the ‘Enabled’, radio button. Input a * in IPv4 filter and IPv6 filter as an ‘any’ wildcard.
- Click ‘OK’.
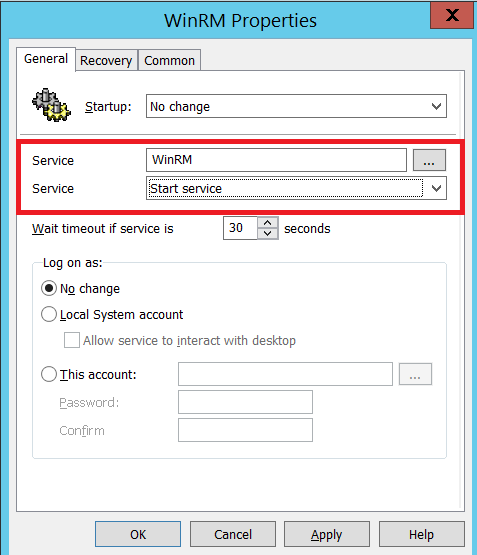
Next, we need to create the WinRM service.
- From the Group Policy Management Editor, navigate to Preferences > Control Panel Settings > Services
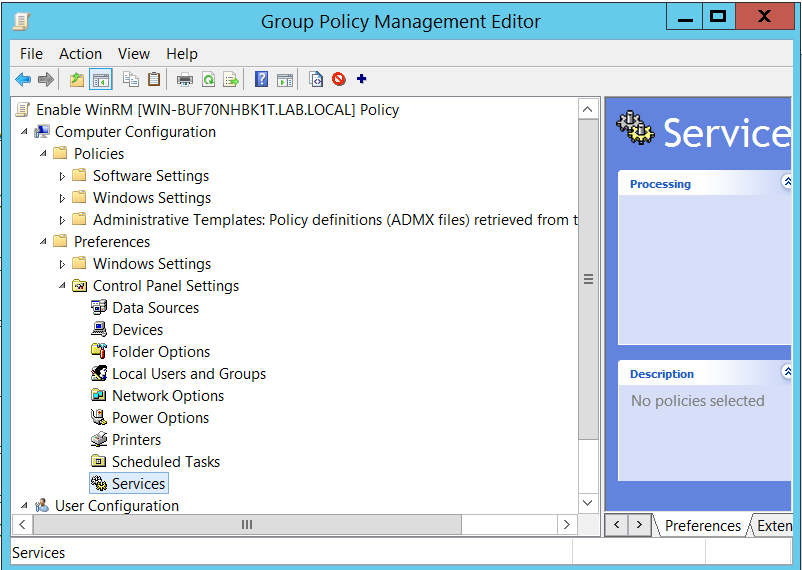
- Right click on Services and select New > Service.

- Click the 3 dots button next to ‘Service’ and select Windows Remote Management from the list.
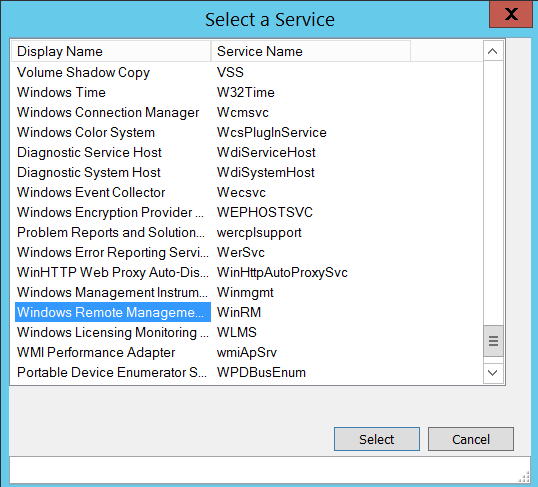
- This populates ‘WinRM’ as the survie name.
- Select ‘Start Service’ from the dropdown menu.
- Click ‘OK’
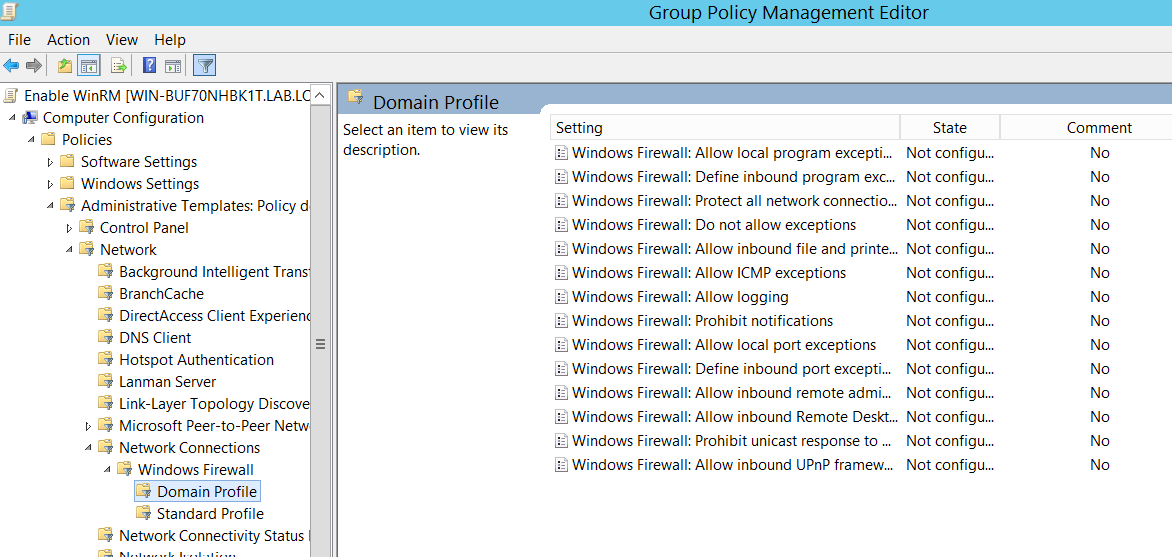
Next, we need to update the Windows Firewall rules to allow inbound WinRM connections.
- From the Group Policy Management Editor, navigate to Computer Configuration > Policies > Administrative Templates: Policy definitions > Network > Network Connections > Windows Firewall > Domain Profile.
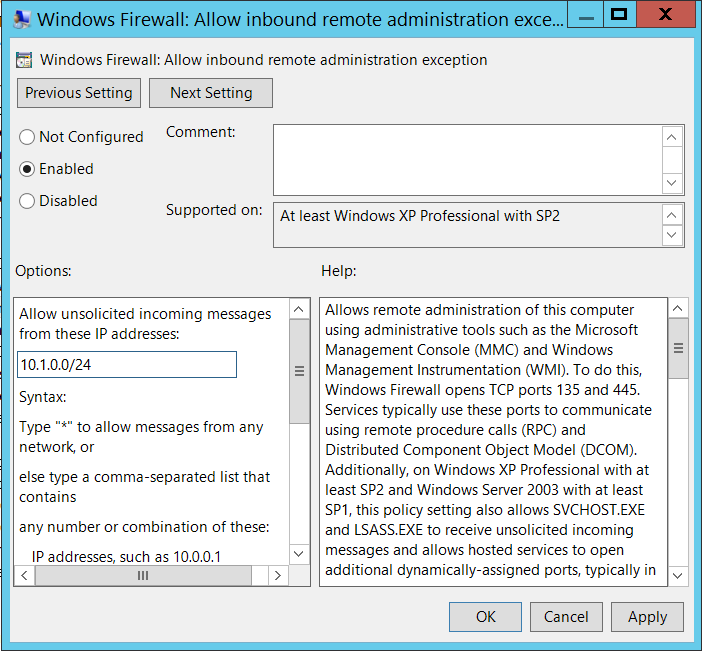
- Edit ‘Windows Firewall: Allow inbound remote administration exception’
- Select the ‘enabled’ radio button and in the IP addresses text box, input the IP addresses (comma separated) or subnets from which to allow connections. A * can also be used but is not recommended from a security perspective.
- Click OK
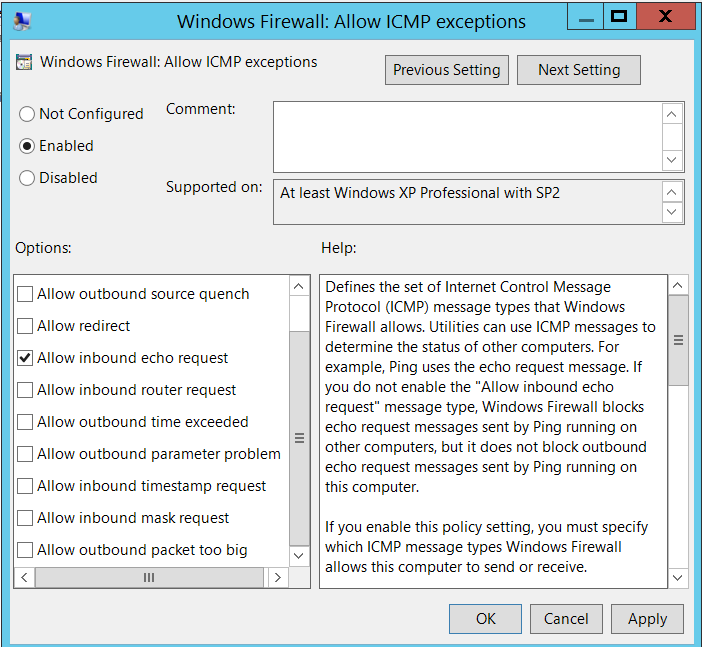
- Edit ‘Windows Firewall: Allow ICMP exception’, select the ‘Enabled’ radio button and select the option ‘Allow inbound echo request’.
- Click OK
Next, we update the inbound rules to restrict inbound connections from unidentified segments.
- From the Group Policy Management Editor, navigate to Computer Configuration > Policies > Windows Settings > Security Settings > Windows Firewall with Advanced Security > Windows Firewall with Advanced Security > Inbound Rules.
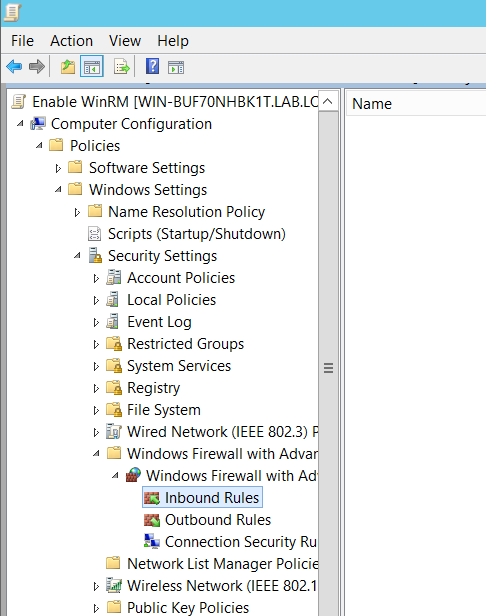
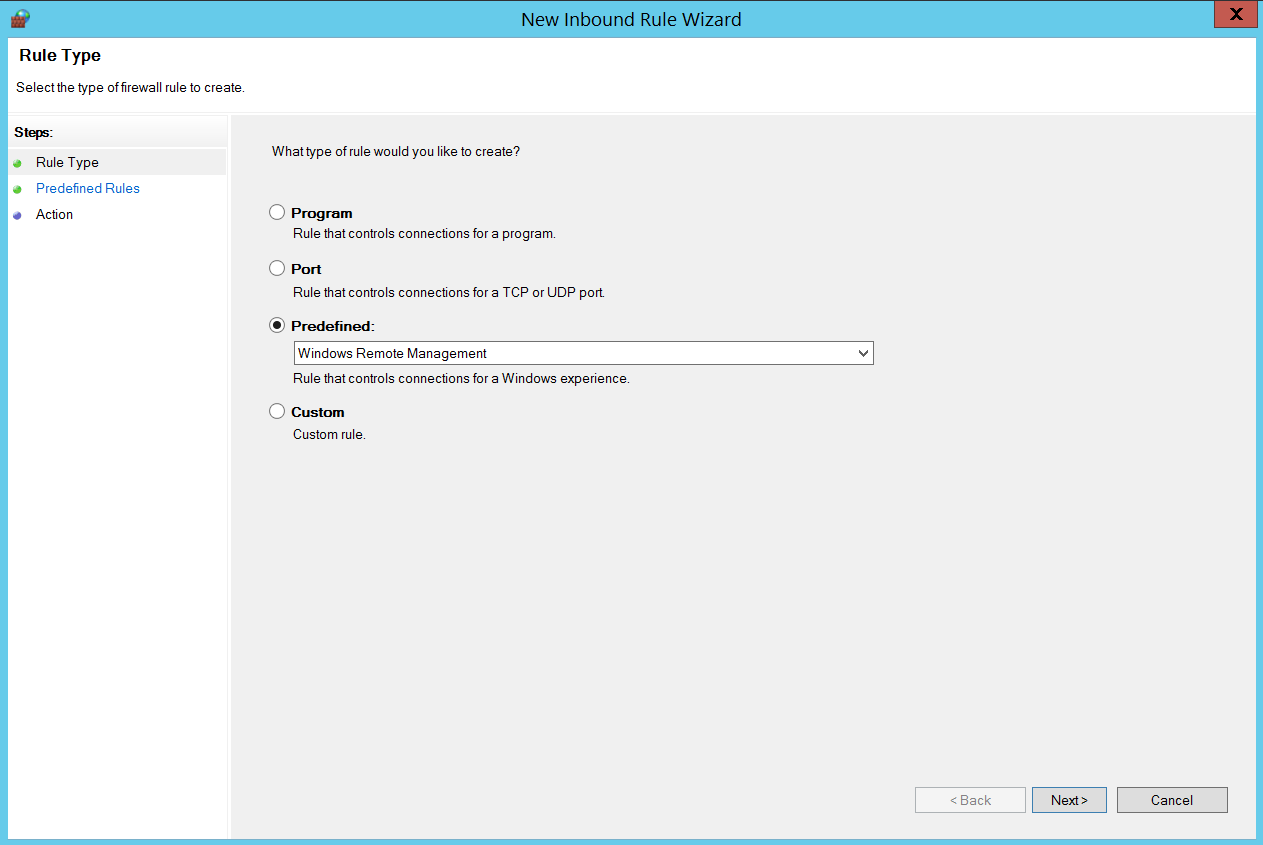
- Right click on ‘Inbound Rules’ and click ‘New Rule’
- Select ‘Predefined’ and from the list, select ‘Windows Remote Management’.
- On the next screen, uncheck the ‘Public’ profile.
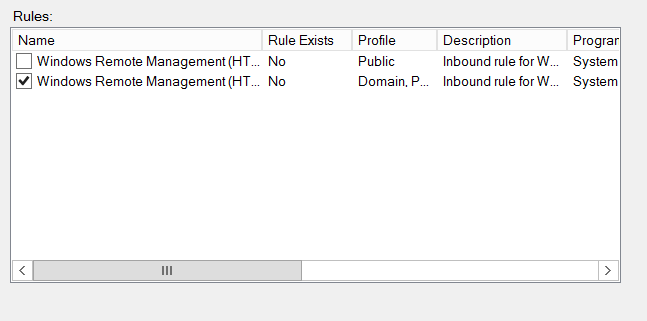
- Click ‘Finish’
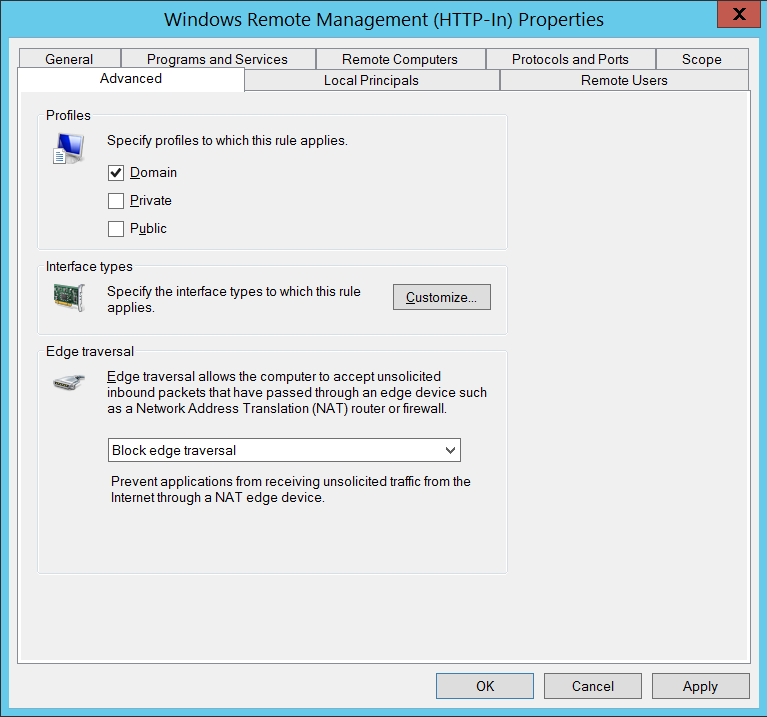
- Right click the newly created rule and click ‘Properties’.
- From the ‘Advanced’ tab, uncheck ‘Private’ and click OK.
- From the Group Policy Management Editor, navigate to Computer Configuration > Policies > Windows Settings > Security Settings > Network List Manager Policies.
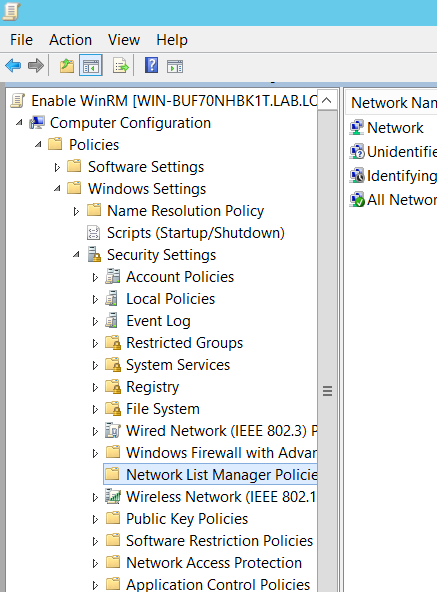
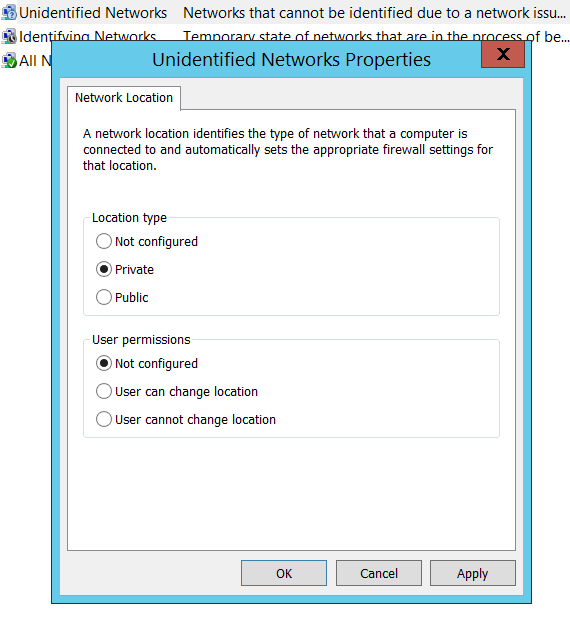
- Right Click on ‘Unidentified Networks’ and click on ‘Properties’. Change the location type to ‘Private’ and click ‘OK’
This post is written by Sandeep Renjith, Cyber Security Analyst at DTS Solution